Sunday 20 December 2020

Its Time for Christmas...!!!

Hello everyone... Its time for Christmas..
"The magic of Christmas never ends and its greatest of gifts are Family and Friends.."
To say so, I created this project to gift one of my very special loved one and also few Christmas cards...

I wanted to make something that was dimensional but also exhibit its beauty... something that was eye-catching..
So I came up with this idea of a small landscape view of a Christmas village, that can also be hanged on the wall.
Most of the items are used from DressMyCraft products, including the glass ball, TransferMe sheets, bells, clay, coin light and glitter. I was so happy with how it turned out, I really enjoyed making this special gift..!!
These are few cards I created as Christmas gifts... simple yet elegant.
The card base measures 5x7" in size with pastel pink and off-white cardstocks.
I have used pattern papers from DressMyCraft and background die-cuts are using the Elegant Swirl Gateway dies from Heartfelt Creations.
The focal element with the sentiments are from the Noel Ornament and sentiments collections from Heartfelt Creations. I used foamiran flowers on all the cards using the flower making dies from DressMyCraft.
I hope you all liked these projects and I wish all of you a Happy and Joyful Christmas with 
 a Prosperous New Year...!!

Saturday 21 November 2020

Altered Wooden Heart - wall hanging

 Hello everyone, welcome once again and I hope you all are doing great.

Sharing an exciting project today on my blog... an altered wooden heart - wall hanging. I had this wooden heart-shape wall decor base from long time and wanted to create something special this time. I decided to incorporate beauty and craft together in this project and looked-up into my stash for the things I could play with - hoping to create something wonderful... 😍

To begin with, I primed the base with 2 coats of white gesso. I did some stenciling using modelling paste and few stencils from Craftreat, randomly over the base. To embellish the base, I took few items like a rectangular resin frame, some clay mold leaves and corners, as well as , a chipboard piece of a lady.

Arranged the embellishments as I wanted and also used some clear cabochons and various sizes of art stones for added texture and glued them in and around the chipboard and frame. I also adhered some old paint brush on one side of the frame for interest.
Once again coated the whole arrangement with white gesso. Once dried I added colors starting with the lightest of  the pink shade and gradually layering it with darker shades focusing on the corners - heat setting in between each layer I add on.
I did some highlighting on the arrangement with some peacock blue color using dry-brush technique and another layer of Nuvo gold mousse. Adhered the gold heat embossed chipboard embellishment, on top of the frame along with 
a key-and-heart lock embellishment below the chipboard.
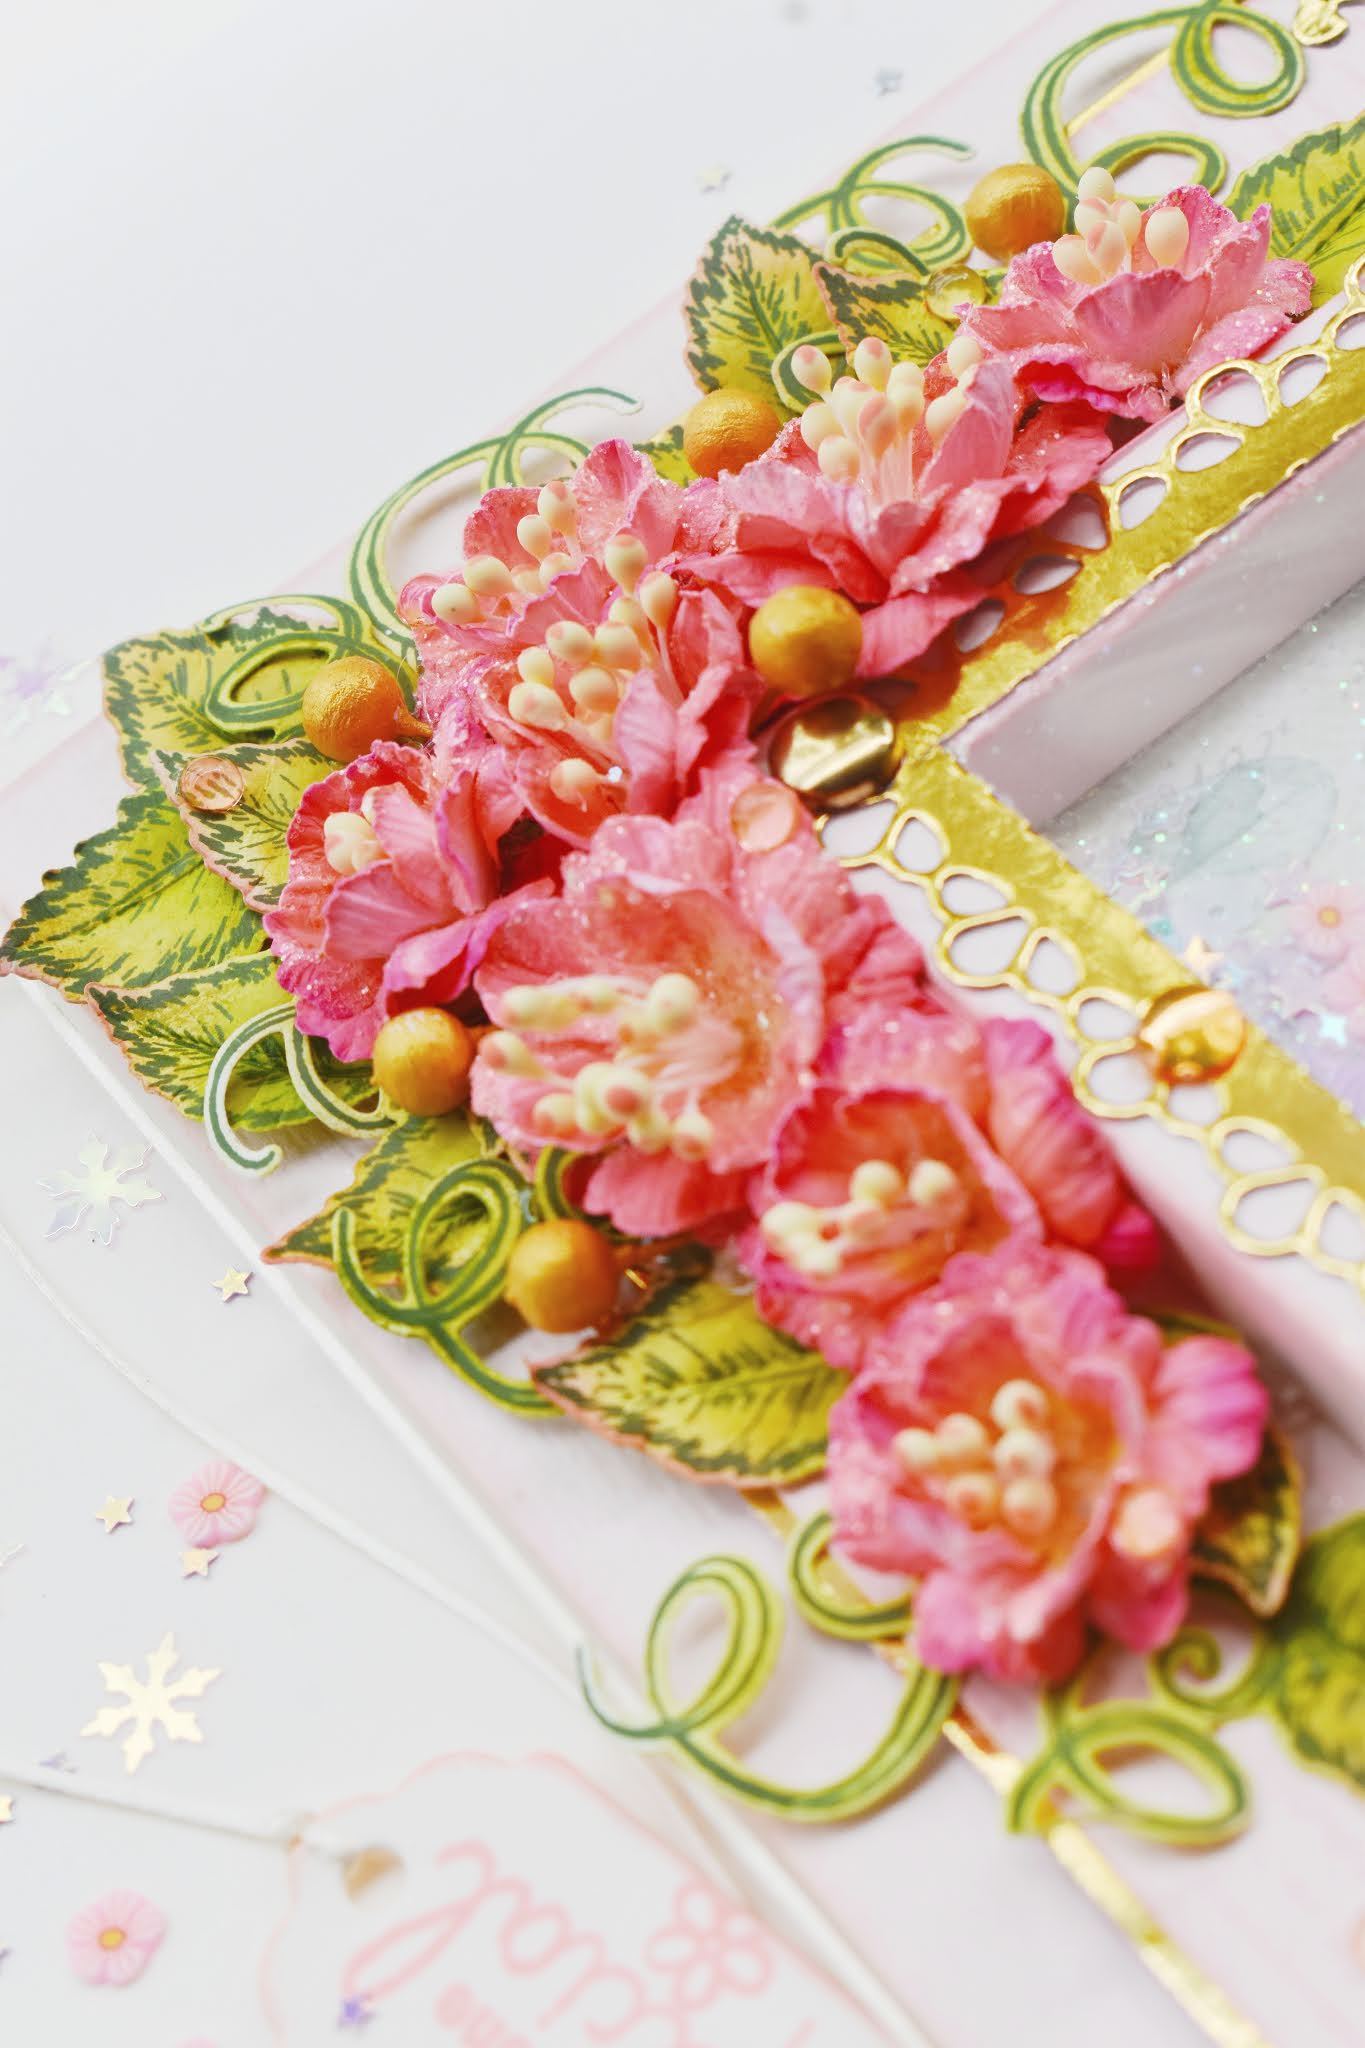
Now comes the fun part - adding flowers.... I used the medium size stamp from the Heartfelt Creations Wild Rose collection, stamped with Garden Patina archival ink on floral paper. Colored the petals using French Ultramarine and Prickly Pear archival inks. Stamped some leaves with Leaf Green archival ink on floral paper and colored using the same color along with some Buttercup archival ink. Die-cut the petals and leaves using coordinating dies, soaked them in water, dried and shaped them using embossing tools. After drying, stacked the petals with some pollens and then I applied Crystal clear glitter on all the flowers and leaves. I also used some small flowers from my stash which I had created earlier using DressMyCraft - Ruffled Rose dies.
Arranged the flowers and leaves around the frame and chipboard sentiment, along with my hand written sentiment - Be Beautiful, onto a die-cut piece from Heartfelt Creations - Tickets and Tags die collection. The sentiment piece was shaded using Rose Madder, Magenta Hue and Cactus Flower archival inks - to match with the entire project. Finally added some heart shaped clear water droplets to finish off the project.

I enjoyed making this project very much and the final look is amazing.... loved loved loved the outcome. Hoping to come up with new ideas and lovely projects soon. Bye all for now... stay safe and healthy.

Wednesday 11 November 2020

Altered Bird House

 Hello everyone, sharing my new project with you all.. an altered Bird House.

I started with applying a coat of gesso all over the surface and once dried I colored with 2 colors of chalk paint - one for the roof and the other for the body. I used papers from DressMyCraft 'Chirping Birds' pattern paper collection, to cover the roof and the sides of the bird house. I cut the paper into thin strips, distressed the edges and adhered them on the base to form wood plank arrangement.
For the front and back, I have used 'Chirping Bird' transferme sheet from DressMyCraft.
I used clay moulds from AartyCrafty by Shalini Agarwal, for the creeper plants as well as the rock paving on all the sides of the base and colored them. For added texture, I glued microbeads all over the base and gave a coat of clear gesso.
I applied some Nuvo gold mousse all over project using dry-brush technique, for highlighting. Created some flowers with DressMyCraft Shrink-Prink sheets, using Ruffled-rose dies from the same brand. Added the flowers randomly over the creeper plants.
I also added a circle swirls frame on the front opening of the bird house, colored with lavender color chalk paint.

I used the same Nuvo gold mousse to apply on the rear edges of the roof. 
Once dried, applied 2 coats of spray varnish covering the whole project. 

Saturday 31 October 2020

Shadow box shaker card

 Hello everyone, hope you all are doing good... 

Today I'm sharing a wonderful project with you all. 

This is a beautiful birthday card, for a special someone.. and that is none other than my mother.


The card is 6x7'' in size with a shaker element as one of the focal point. I have used pastel pink textured cardstock for the card base and also to make the shadow box for the shaker.


I have also used gold mirror cardstock to give that elegant look and also add beauty to the card. I used a matt layer of pastel pink card stock, which was scored to give that extra stripe pattern along with the gold mirror card stock ; under the shaker element.

For the flowers I used the smallest of the Wild rose collection, stamped with Costal Coral archival inks and colored with Prickly pear and Costal Coral archival inks. Die-cut the petals using the corresponding dies, soaked them in water, removed the excess water and shaped them using groove tools. I used light yellow pollens and colored the tips with Costal Coral , arranged and glued the petals to form open Rose flowers.
For the leaves, I used the leaves from Classic Rose collection, stamped them using Olive green archival ink. Colored the leaves using Prickly pear and Leaf green archival inks and cut them using the coordinating dies. I used the similar shaping method as of the flowers.
I used several die-cut elements with gold mirror card stock using few of the Heartfelt Creations dies including the sentiment piece. Arranged and glued the flowers and leaves as shown in the picture.
For the shaker, I have used many elements including sequins, flower pearls, shaker slices as well as some fine glitter.
I enjoyed making this card and loved the outcome... Will come up with more and more beautiful creations... Hoping that you all stay safe and healthy.. 😍

Monday 21 September 2020

Wedding gift - handmade album.

 Hello everyone, today I'm sharing another beautiful project I created for a customized order.. this is a handmade album for Wedding gift, including Cricket theme as well...


I have used pattern papers from Papericious - The Flickers, Blooms and Berries which matched well with red color theme for Wedding and love.

This album size is 6x9" and can hold up to 17-19 photos. I have distressed all the edges of the papers, die-cuts using Festive Berries distress ink which matched the flowers and the pattern papers. The flowers were made with 5-petal flower dies colored using Carnation Red and Red Geranium archival inks. The filler flowers were colored using Sunflower archival ink.
The leaves are cut using rose leaf die from Itsy Bitsy, colored using Sunflower, Rose Madder and Leaf Green archival inks.
I have used many pockets and flaps along with Twist-n-Spin pop-up section and a slider element. I have added my own hand-written quotes on friendship, marriage and love.
The main element on this album was the part with the Cricket theme. I used cricket themed chipboards from TheElementCraftStudio, and used these with an 'Inside Surprise spinner' section. My customer wanted to make this as a very memorable gift and I hope I could meet up the expectations...!

The box size is 7x10'' in size with a top open section. To check in the complete video of this album, please click here.


Tuesday 18 August 2020

You make me Smile - 4x4 Mini album - #DMCCROWNSTAGE3

Welcome again to my blog.. Im sharing my latest project created for the DressMyCraft - DMC Crown contest. I was so excited to get through the first 2 levels of the contest and enjoyed creating the new projects. For the final round, we were asked to make a 4x4 mini album with a box/basket to keep the album. Shalini Mittal was also so generous to provide us with the goodies to make the album. 

This album can hold up to 32 photos, with many pockets and folds. The pattern papers I used was from Whispering Love paper pack from DressMyCraft.

Along with the many pockets and folds, I have created one section with 'Inside surprise spinner' card, few pages with small shaker elements, like the one below and another section with Twist-n-Flip pop-up.


You can check the video of my album by clicking the link here.

The box I created is of 5x5" size to fit the album, with a gate fold opening and decorated the sides using the same paper pack. All the other embellishments and flower making making materials are also from DressMyCraft/CraftersCorner.

Heartfelt Creations DT - Snowflake Greetings

 Hello and welcome to another inspiration day... today I'm sharing another beautiful creation using the Star Holiday Collection from Hea...