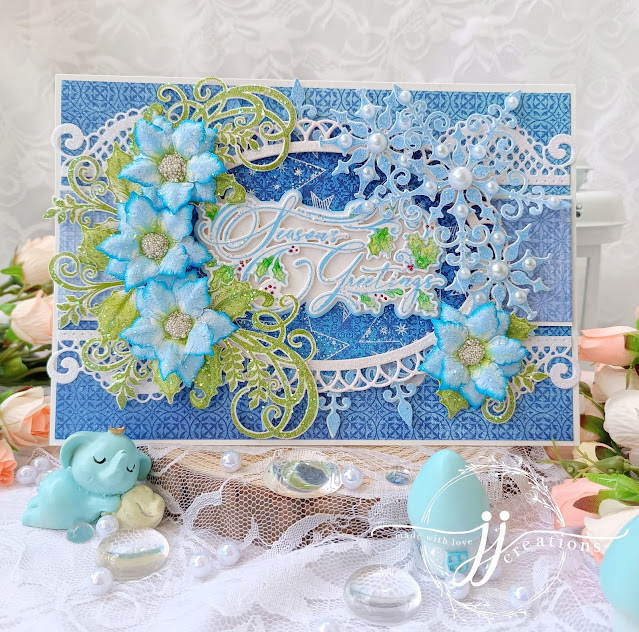
Hello and welcome to another inspiration day... today I'm sharing another beautiful creation using the Star Holiday Collection from Heartfelt Creation !!!

Cut a piece of white card stock measuring 8 x 12" in size, score and fold it in half to create a card base of 8 x 6" in size. Cut 2 pieces of mat layers with sheet 6B from HCDP1-2141 - Holiday Star Paper Collection measuring 1/8 inch smaller than the card base and adhere them on the front and inside panels. Cut a strip of sheet 10B of size 2 1/2 x 7 7/8", score the piece on every 1/8 inch and adhere it to the center of the card base along with a white mat layer giving a thin edge around the scored piece.
Cut 2 pieces of white card stock with HCD1-7211 - Decorative Pocket Accents Die, add diamond glitter with dries clear glue using sponge and adhere them on either sides of the scored strip. Using HCD1-776 - Eyelet Oval die, cut 2 frames with the large oval on white card stock, stack them together and add diamond glitter.

Cut an oval mat layer using sheet 8B with the same size as of the outer most oval. Onto this piece, randomly stamp the smaller star images from HCPC-3994 - Large Holiday Star Cling Stamp Set with white pigment ink and heat emboss with superfine white embossing powder. Adhere this panel with the oval frame on top, to the center of the card base as shown.
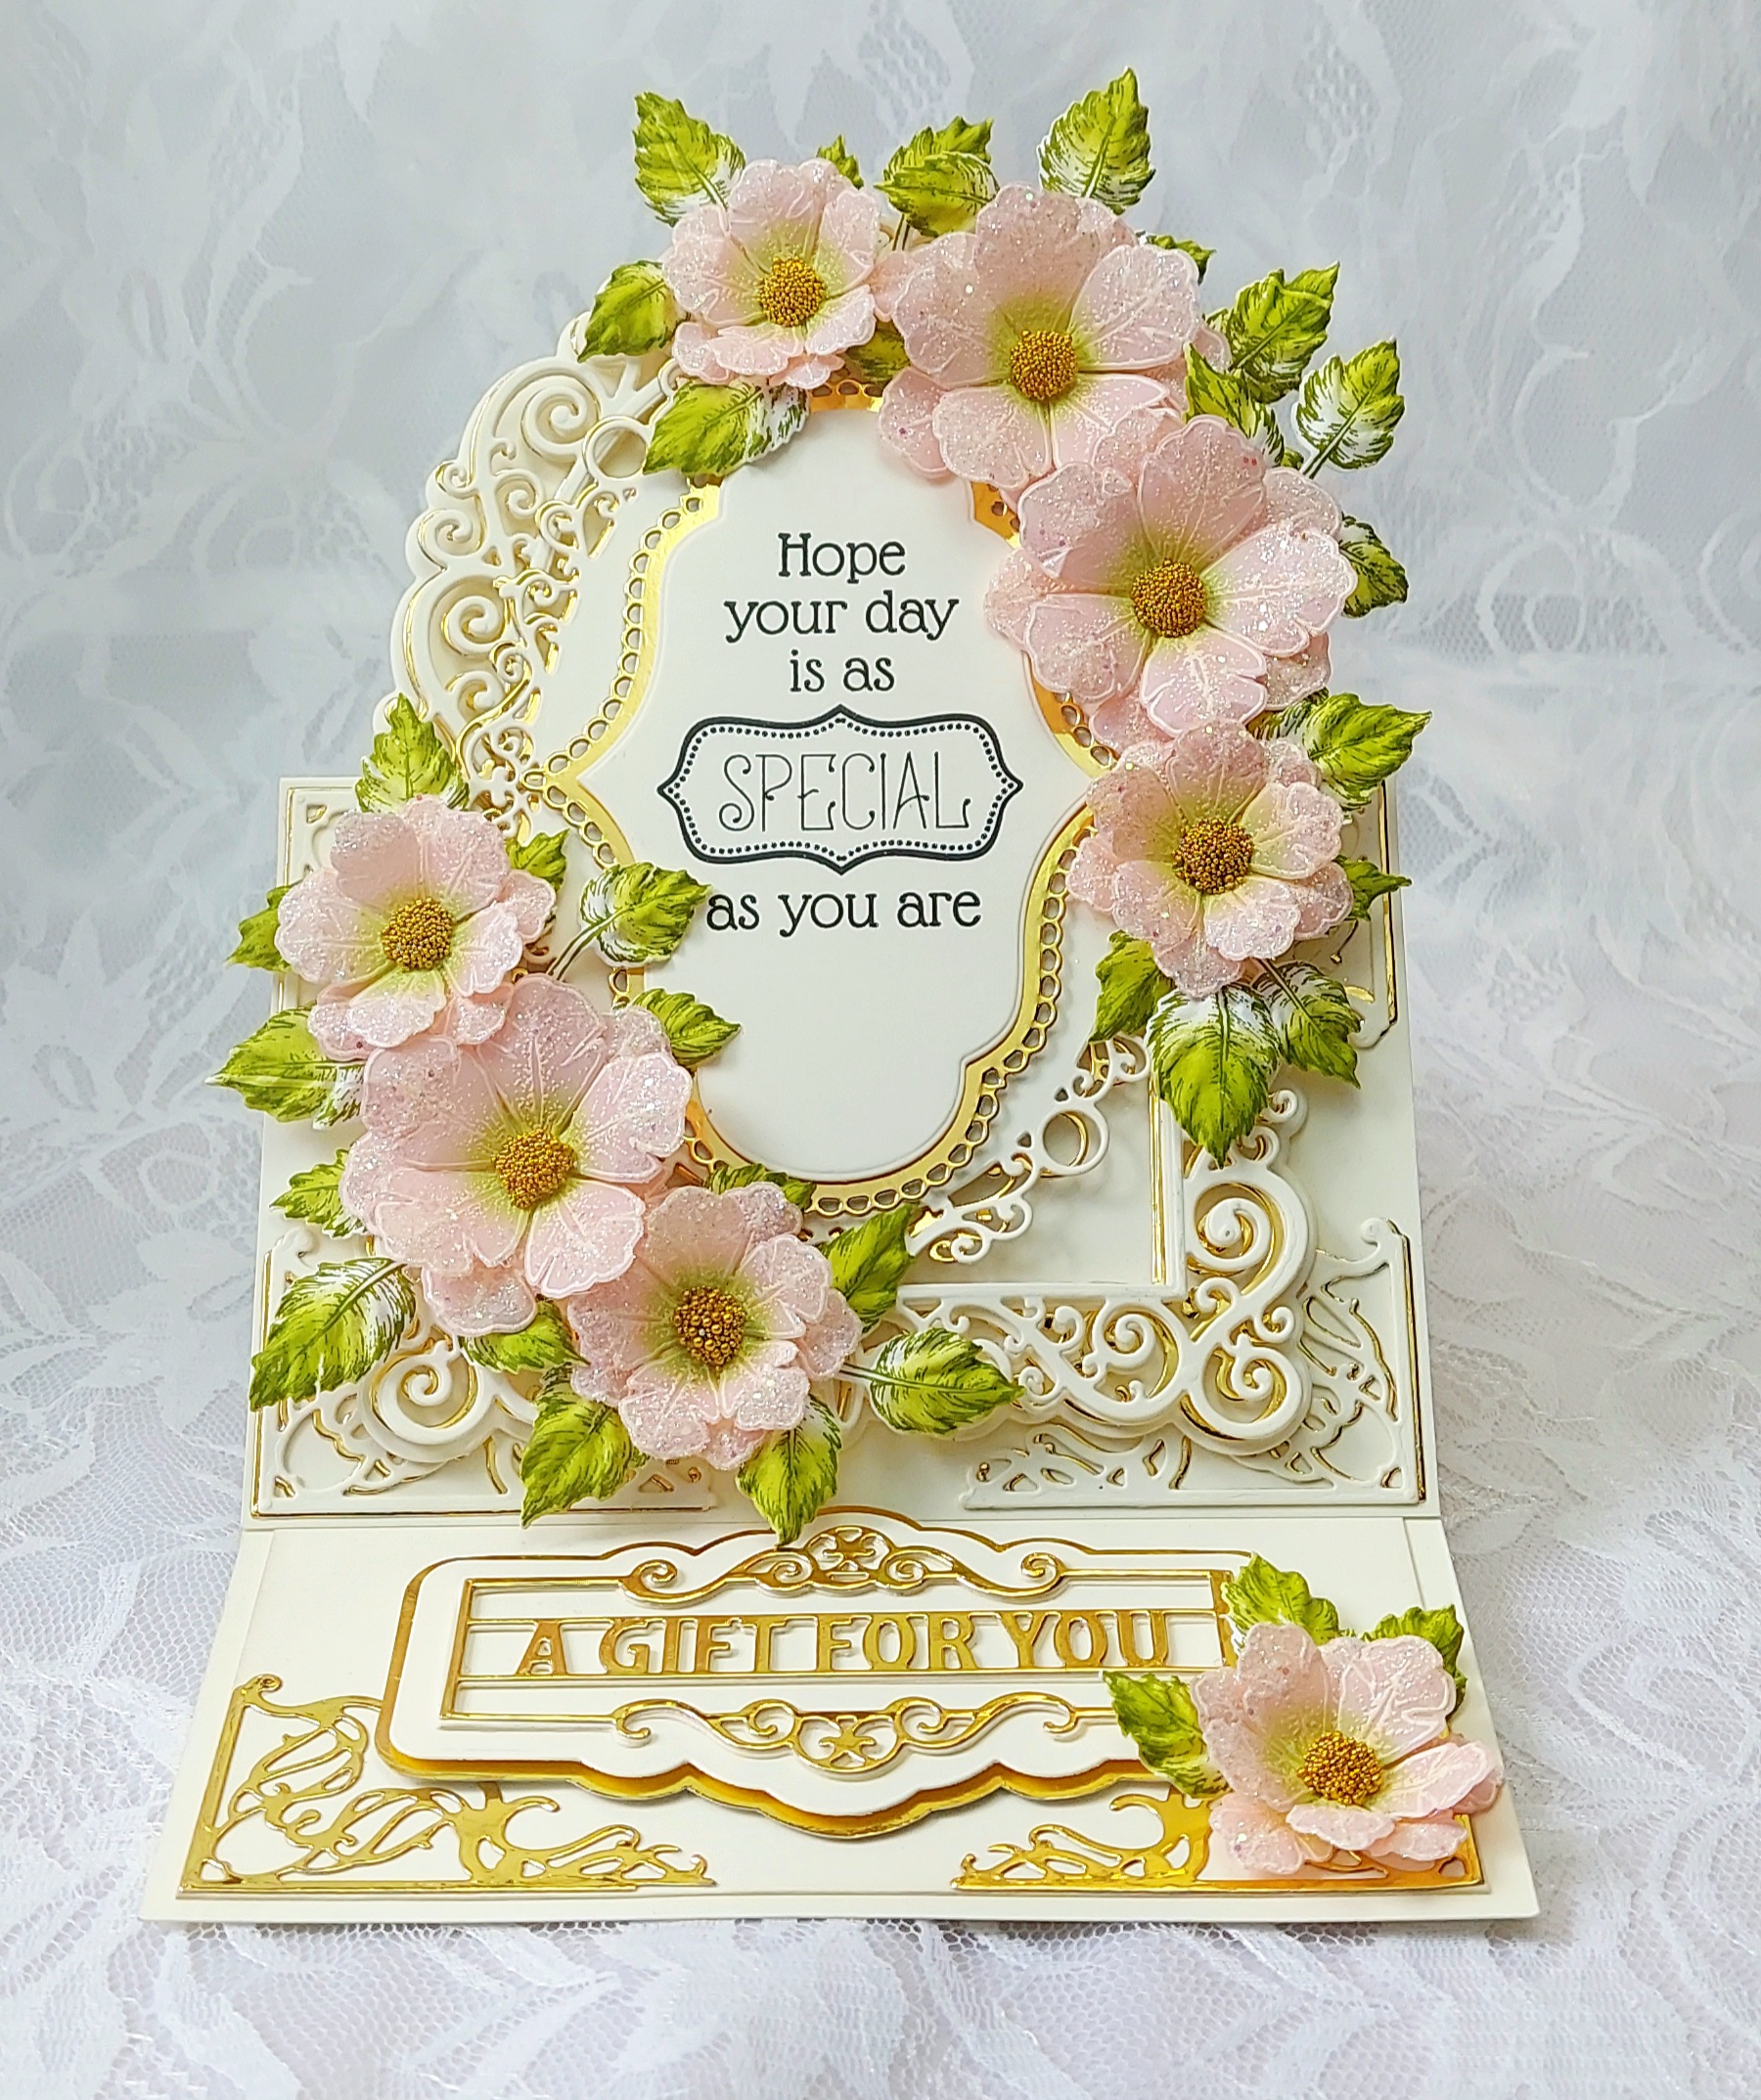
For the sentiment, stamp "Seasons Greetings" from HCPC-3995 - Starry Holiday Greetings Cling Stamp Set onto white card stock with French Ultramarine ink. Color the small leaves and berries using water color and die-cut using the coordinating die. Similarly cut 5 extra pieces of white card stock with the sentiment die and 1 piece of the sentiment outline. Stack the sentiments together with the stamped one on top, distress the edges with French Ultramarine ink, add diamond glitter and
adhere this on the card base along with the outline die-cut.

Stamp a few images of the small flowers from HCPC-3957 - Large Festive Poinsettia Cling Stamp Set with French Ultramarine on white card stock. Color them with Prickly Pear ink on the center and French Ultramarine on the edges and cut using their coordinating die. Shape the petals using flower shaping stylus tools, stack 2 petals for each flower and add white micro pearls for the center. Sponge some dries clear glue on the flowers and add Crystal Clear Glitter.
Stamp a few images of leaves and holly leaf spray from HCPC-3958 - Small Festive Poinsettia Cling Stamp Set and HCPC-3959 - Holly Berry Spray Cling Stamp Set on white card stock with Leaf Green ink and cut using the coordinating dies. Shape them using flower shaping stylus tools and add Crystal Clear Glitter. Arrange the leaves and flowers around the oval frame and adhere using hot glue.

Stamp the large snowflake image from HCPC-3994 - Large Holiday Star Cling Stamp Set 3 times on white card stock with French Ultramarine ink and cut using the coordinating die. Add Crystal Clear glitter on the die-cut elements and let them dry. From 2 of the die-cut pieces, trim off the curvy edges and adhere these trims on the circumference of the oval frame using hot glue. Add white flat back pearls on all the 3 snowflake die-cuts and adhere them on the card front using dimensional tape as shown.