Sunday 10 March 2019

Altered Lantern

Hello all, here I'm sharing an altered project which was also created for the DT call from Heartfelt Creations.
I have created this as a DIY lantern with chipboard I found from YouTube and will be sharing the link below. 


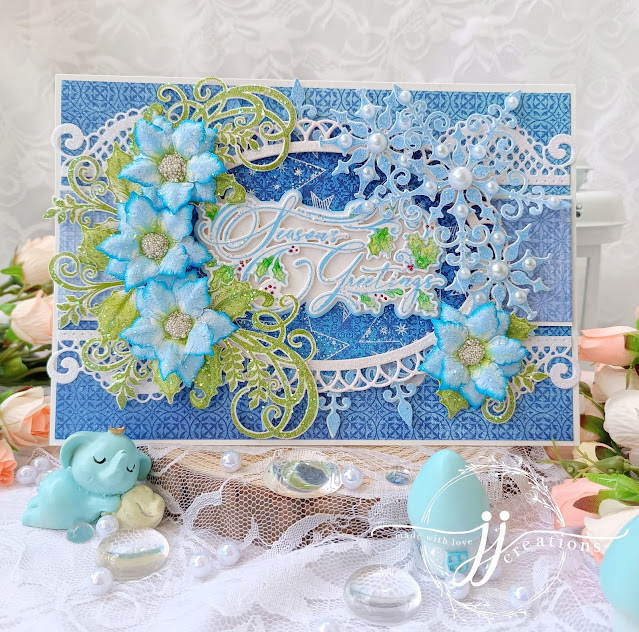
Besides creating a simple DIY lantern, I wanted to alter it with flowers and vines, and chose to make using Art Foam(foamiran). I used colors that contrasts with the pattern paper used for the lantern.


This is how the finished lantern looks.


Please check through the instructions below to make this project.


Please click here to know more on creating the DIY lantern.
I have used 1mm chipboard measuring 5"x8"for the lantern body, the base measuring 5"x5"  and for the roof, a base of 5 1/2" and height of 6". 
 Adhere designer papers on all the cut  pieces including the body, base and the roof. Assemble and glue the pieces together with hot glue or any strong adhesive. For added 
interest, die cut different pattern papers with Scalloped border dies and adhere them to the lower edge of the roof as shown. Once set and dry, lightly sponge all the edges and corners of the lantern with Walnut Stain distress ink.
For the flowers, die cut some petals from cream colour art foam paper using flower dies. Colour the petals using soft pastels with blue on the edges and green on the centers. Use a heat gun or iron to heat and shape the petals as required. Stack and glue 3 petals 
each for a flower, with hot glue. Pierce each of the flower centers and add pink stamens as shown, and apply some sparkling dust glitter  using glossy accents.
Die cut few leaves from green card stock(2 green shades if required) using Leafy accents die, mist some water and shape the leaves. Once dry, sponge the leaves lightly with Walnut stain ink to bring out the details. Arrange the flowers and leaves as desired or as 
shown in the picture, and glue them on the lantern. Complete the lantern with some pearls and other desired embellishments. 
The lantern can be used as a showpiece by itself or place a battery candle inside(for realistic effect) by creating an open flap while assembly.

Products used:
1mm chipboard sheet(12"x12")
CrafTangles Scrapbook Paper Pack - Vintage Rosette (12"x12")
Spellbinders Open Scallop Edge Circles
Heartfelt Creations Leafy accents die
Dress My Craft Create A Flower - Flower Making Cutting Dies
Distress Inks - Walnut stain
Mungyo Soft Oil Pastels - Kadmium green(545),Sky blue(537)
Adhesives - B-6000, Ranger glossy accents,Red Tacky Tape

Fancy fold cards.

Hello Friends, here I'm sharing the cards I created for the DT call from Heartfelt Creations. 


Since I love making cards with fancy folds, I created one Bendi fold and the other one as a front fold Easel card. 


I have created this card using 2 of my favorite products - Decorative Oval die from Heartfelt Creations and Medallion embossing folder from Spellbinders... 😘


I loved making this card with such wonderful colors and the pattern paper added more beauty. The 'Bohemian' paper pack from Dovecratfs have such beautiful
 patterns and colors.


Please check through the instructions and supplies for both the cards.
Instructions for Easel Card : 
Create a top fold card using off-white card stock, measuring 6"x8" and score the front of the card in the center to create the easel card. Take 2 other off-white card stock measuring 1/4" shorter than that the card for the front and inside panel. Die cut the top and bottom edge of both the panels with the Curved border dies and then 
emboss with the Medallion embossing folder. Adhere one of the panels inside the card. Now die cut another piece of card stock with the decorative oval die, apply vintage silk magic wax (for pearlescent effect)on both the front and the oval piece, 
and adhere them on the lower half of the easel card. 
Die cut the large, medium and small flowers from the Arianna blooms collection. Shade the petals with Seedless Preserves distress ink on the edges
 and Wild Honey on the center of each petal.
Die cut the leaves from green card stock using Leafy Accents die. Mist the flower petals and leaves with some water and shape them using the groove tool or flower shaping mold. Once dry, lightly sponge the leaves with Walnut Stain ink to give 
an extra definition for the veins. Layer the flower petals with some stamens from the same collection and glue the center with some flat back pearls. 
Arrange the flowers and leaves on the front and inside panel of the card as shown.
 Adhere some flat back pearl strip on the inside panel to make the easel stand.
Finally, complete the card with a sentiment and some more pearls.

Products used:

110gsm Off-white Cardstock
Spellbinders Curved Borders Two Die
Spellbinders Medallion Embossing folder
Heartfelt Creations Decorative oval die
Heartfelt Creations Arianna blooms die
Heartfelt Creations Leafy accents die
Distress inks - Seedless Preserves, Wild Honey, Walnut Stain
Prima Marketing Opal magic wax - Vintage silk
Adhesives - B-6000, Ranger Glossy Accents,Red Tacky Tape


**********

Instructions for Bendi Fold Card : 

Create a card base with cream card stock measuring 7"x7". Cut 2 flaps for the front from cream card stock measuring 4 1/2"x7"  and 2 1/2"x7".  Die cut both the flaps on the top edge using the Scallop border die giving a slope from the opposite sides. 
Please click here to know more about the bendi fold template.
Take a designer paper which is 1/4" shorter than the card base and punch all the edges with Border punch set, and adhere it to the card base. Layer the same designer paper on the back of the base card as well as on both the flaps. Lightly sponge all 
the edges of the card with Mustard seed ink.
Stamp the desired sentiment on a die cut piece using Open scallop circle die. Die cut 2 swirl pieces from cream card stock using the small Intricate swirl frames die. Sponge them lightly with Worn Lipstick and Wild Honey inks. Cut the swirls into equal 
halves and arrange them behind the sentiment piece, 
and attach the whole panel to one side of the card base.
For the flowers, die cut some large, medium and small petals with the flower dies and sponge them using Worn Lipstick and Wild  Honey distress inks. Mist the petals with water and shape them using a groove tool or flower shaping mold. Once dry glue the petals
 together to form rose flowers. Apply some sparkling dust glitter powder on each of the flowers using glossy accents and for the flower center, glue some green seed beads. 
For the leaves, die cut few leaves from dark green card stock using the Grand vinery die and sponge the edges using Worn Lipstick ink
 to give a double shaded effect. Glue the flowers and leaves on the card as per the desired arrangement or as shown in the picture.
Finally, complete the card with some desired embellishments like butterflies/birds or pearls.

Products used:
110gsm cream card stock
Spellbinders A2 Scalloped Borders One Die
Spellbinders Open Scallop Edge Circles
Heartfelt Creations Intricate Swirl Frames Die
Creative Expressions Grand Vinery Die
Dress My Craft Ruffled Rose - Flower Making Cutting Dies
Martha Stewart Crafts Punch Around The Page, Crochet Loop
Dovecraft Bohemian 12x12 paper collection
Distress Inks - Worn Lipstick, Wild Honey,Mustard seed
Memento Tuxedo black ink pad
Adhesives - B-6000, Ranger glossy accents,Red Tacky Tape

Monday 4 March 2019

Birthday card - foamiran flowers.

Hello all, sharing my new project which I created for my niece's birthday..

This is my first trial creating a Joy fold were the base card folds in from one side and a smaller card folds in from the opposite.

I made this card simple yet attractive for kids with flowers and butterflies.. 
There are numerous possibilities with this card based on your imagination and the products you use.


This is the inside view of the card, I made the flowers stay flat as I needed to send it through mail.


Heartfelt Creations DT - Snowflake Greetings

 Hello and welcome to another inspiration day... today I'm sharing another beautiful creation using the Star Holiday Collection from Hea...