Hello fellow crafters, sharing the recent project I created for Heartfelt Creations DT Call'22.
This is my 3rd time applying for the DT call and I hope my creating are up to the mark.
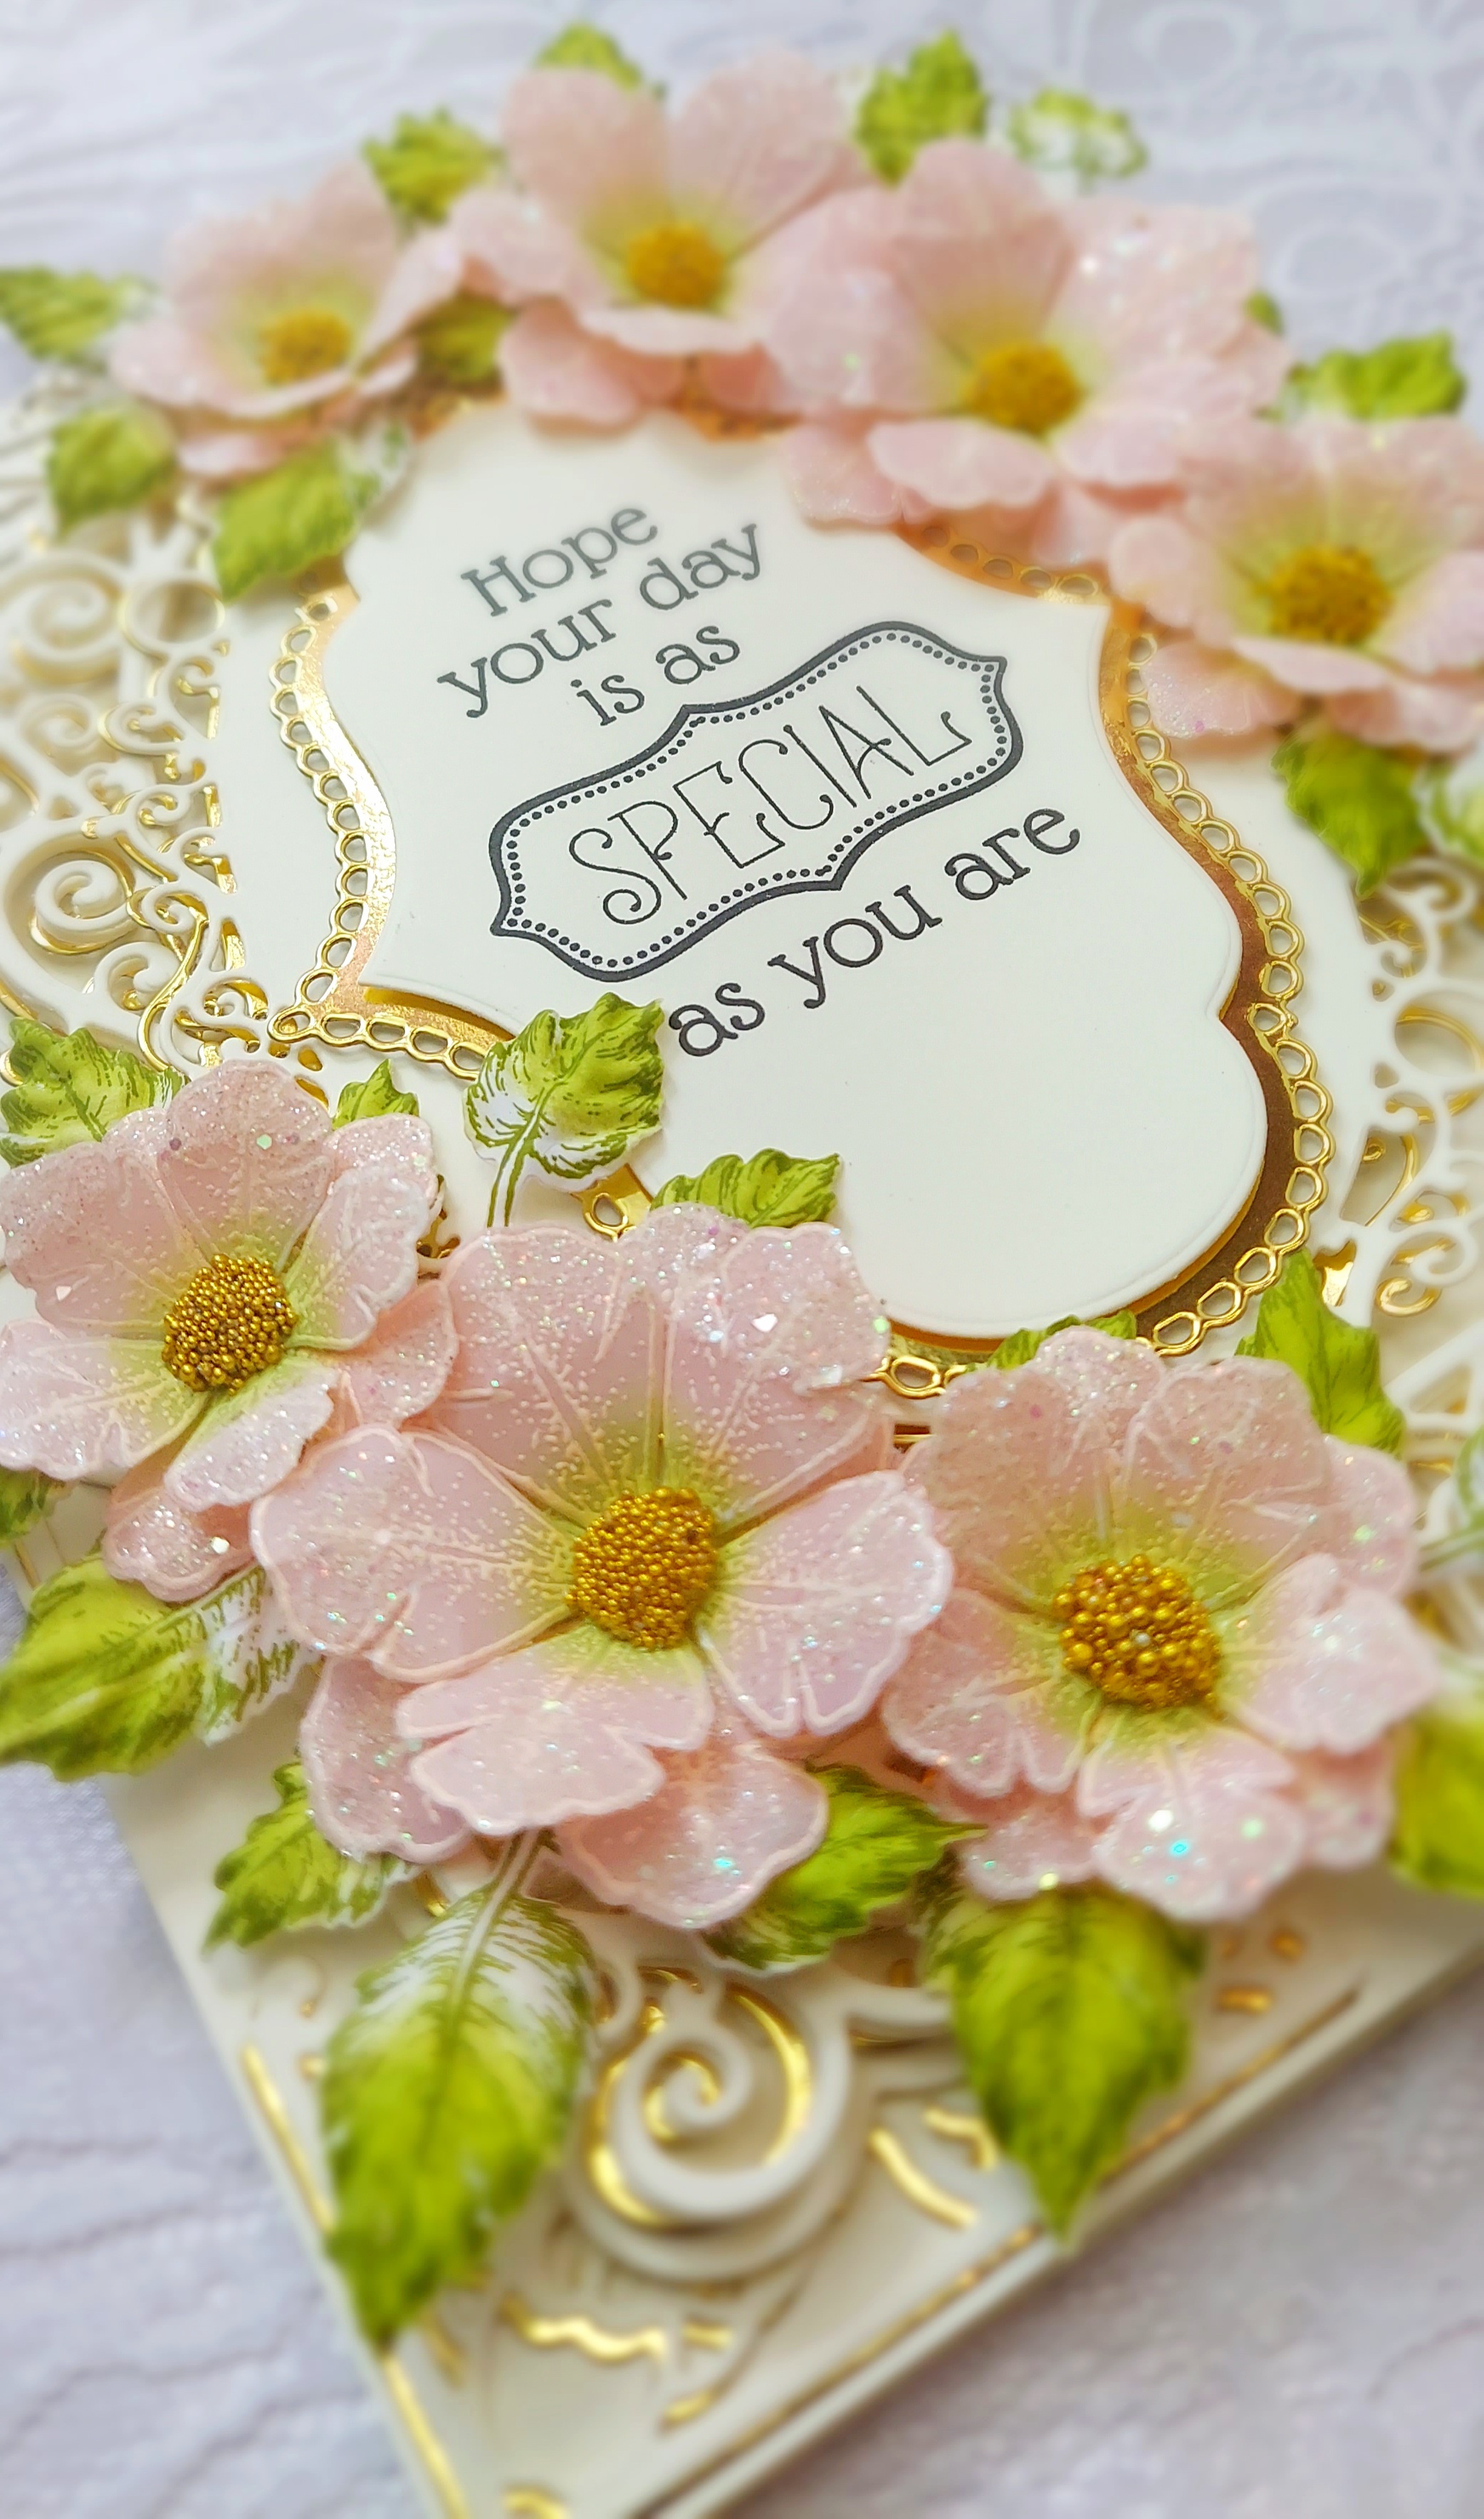
Here I have created a birthday card with simple yet elegant look with an easel card base and vellum flowers.
I love arranging and layering a variety of die-cuts that can give and elegant look by itself - and that is how I created this card with flowers to accent the beauty.
The instructions for making this card is given below along with the materials used.
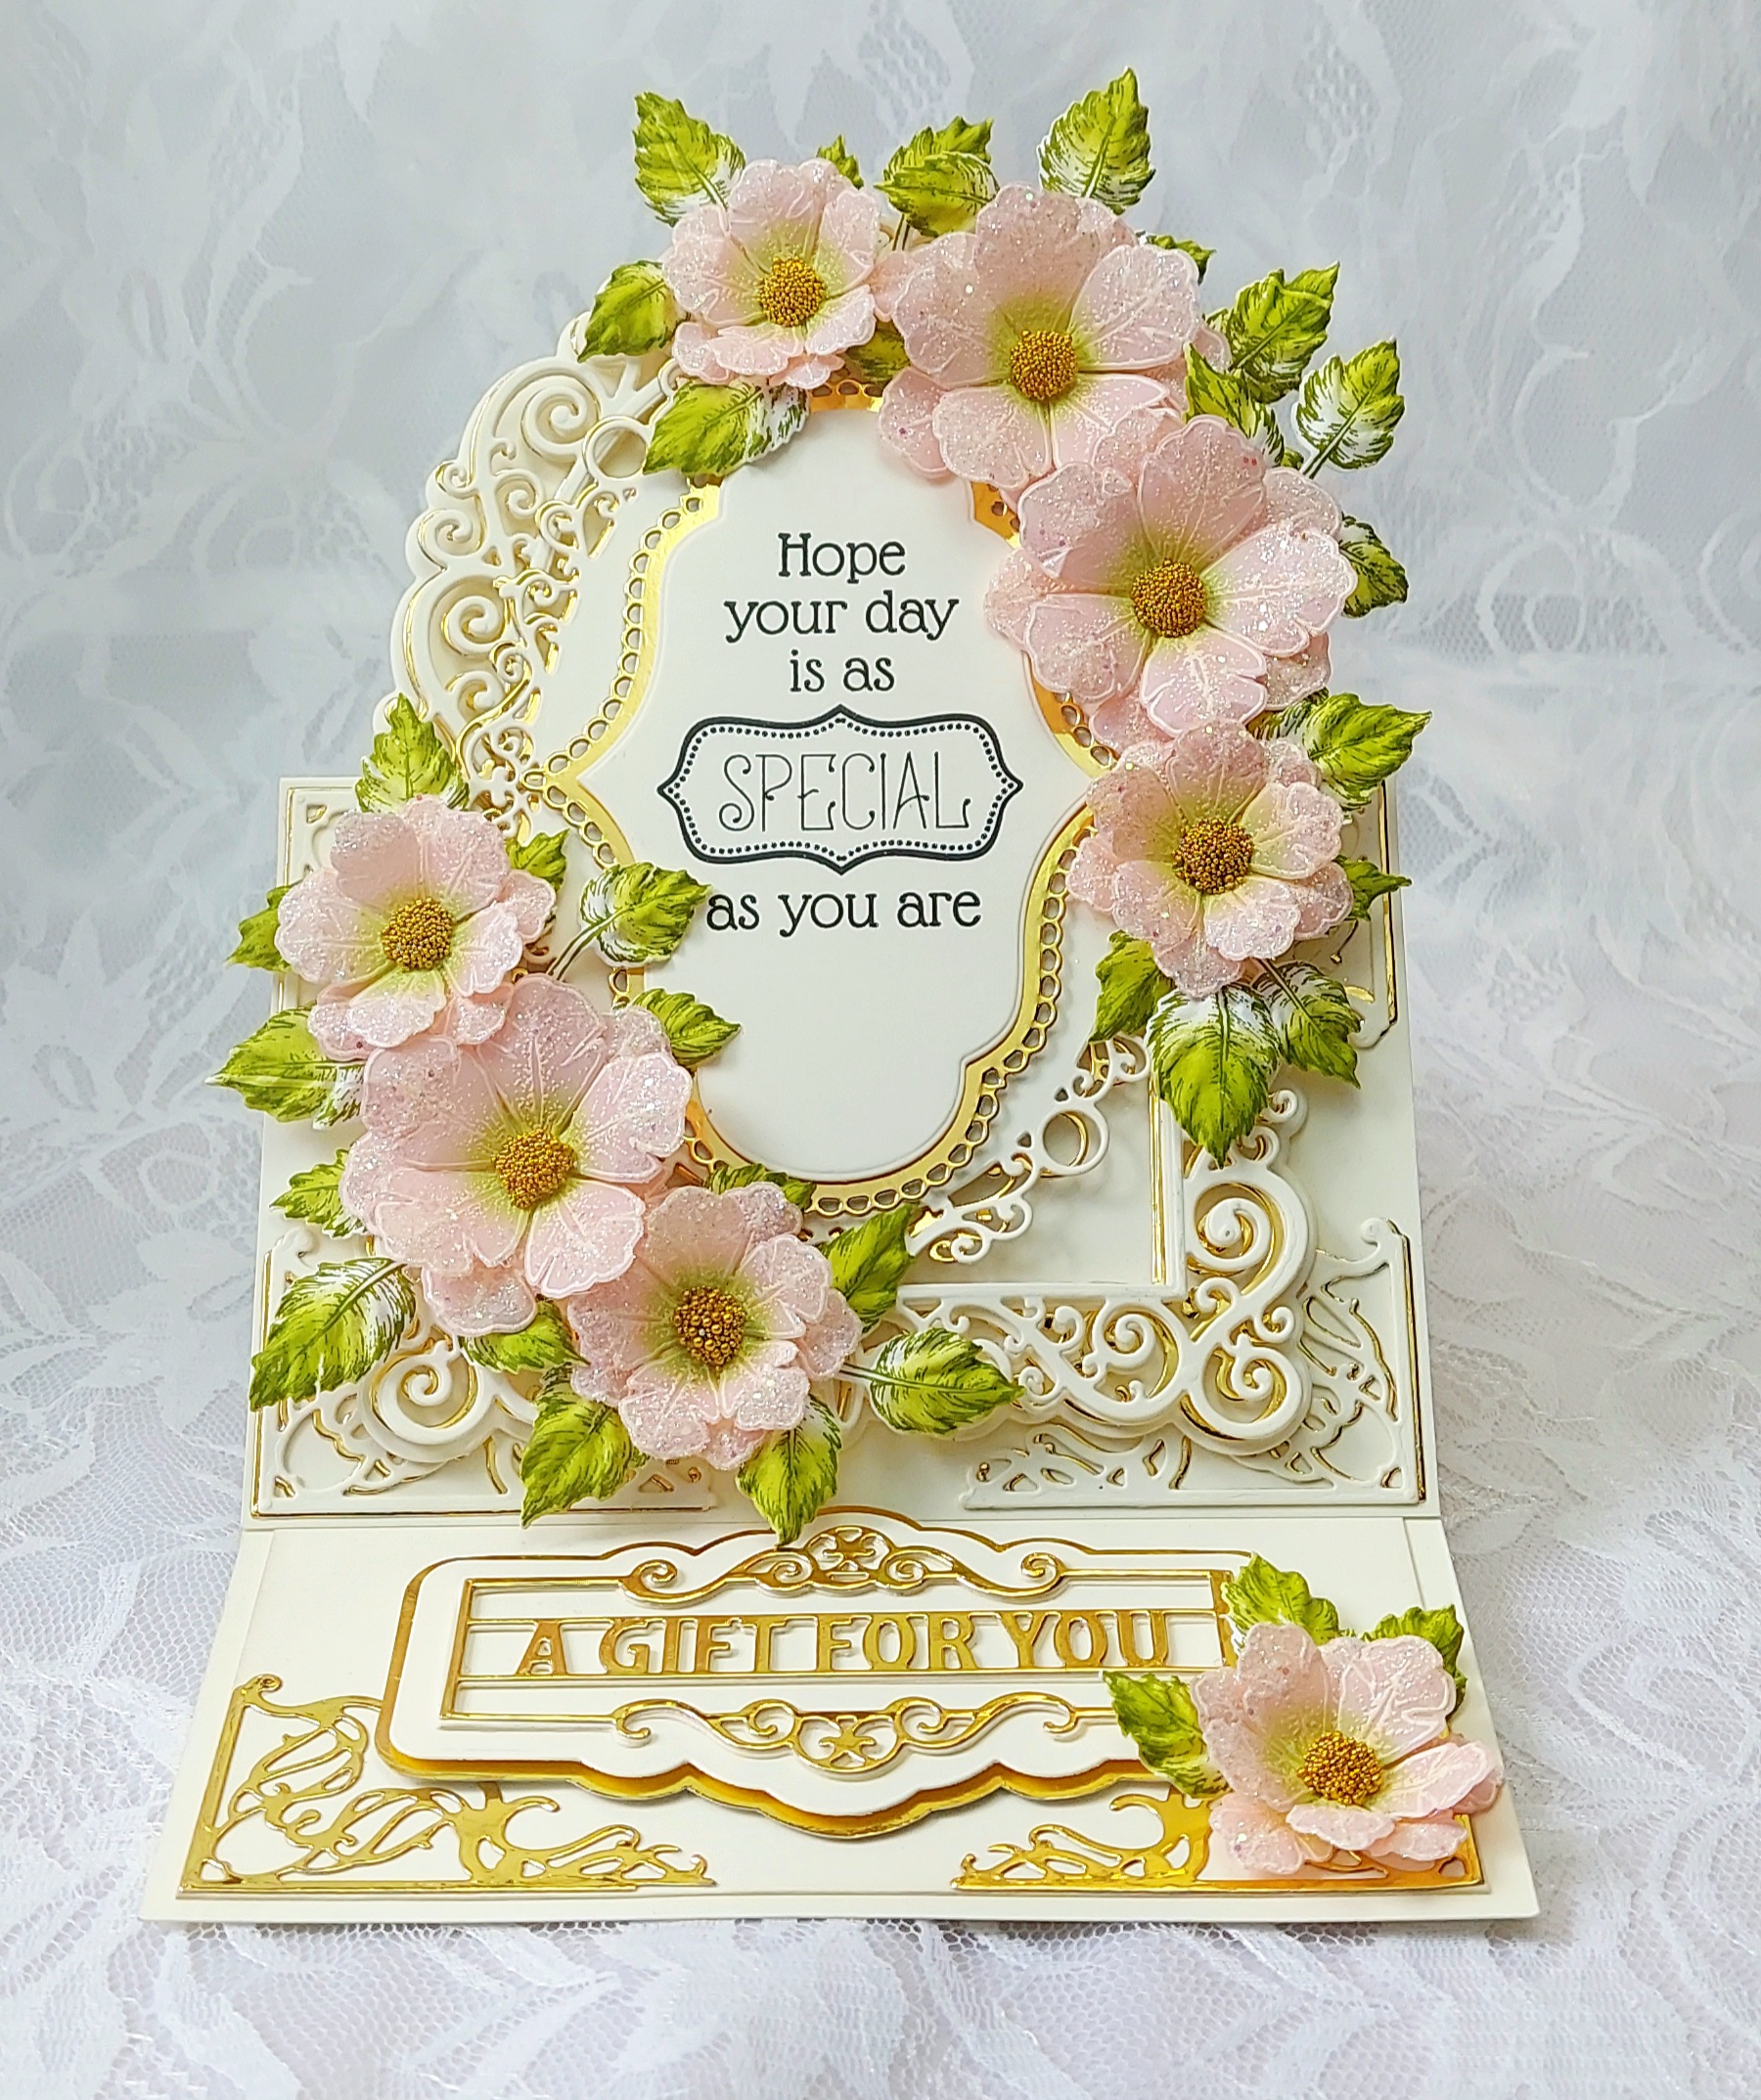
The ready top fold card base measures 6" by 7 1/2". To prepare the base, take one piece each of 6" by 7 1/2" and 6" by 8" card base on Ivory card stock. Score the second base at 1/2" at the long side, to make a hinge and adhere both the base along the hinge. Score the top card base at 3 1/2" along the long side and fold it to form an easel front.
Die cut 1 piece each of ivory and gold card stock using the largest of Sweetheart border die, stack and adhere them together with the gold piece under the ivory slightly off setting. Adhere this on the top fold of the front panel. Die cut 4 each of Ivory and gold pieces using the corner die from Swirly Accent Spray die set, stack and adhere them slightly off setting on the 4 corners of the bottom half of the front panel.

Die cut 2 ivory and 1 gold piece from the large frame of Elegant Swirl Gateway die set, stack them together using dimensional tape and adhere on the bottom half of the front panel. Die cut 1 piece each of ivory and gold using the largest of the Ornate Ovals die set. Stack them off setting and adhere on the center of the Swirl Gateway die cut using dimensional tape. Die cut 1 gold piece with the scallop accent die from the Album tags die set, die cut 1 ivory piece with the inner accent die; stamp a sentiment on the ivory die cut piece, stack it on top of the gold piece and adhere them on the center of the oval die cuts.
On the inner card base, adhere 4 gold die cut pieces on each of the corner using the corner die from Swirly Accent Spray die set. Using the sentiment die from the Ornamental tags die set, cut pieces of ivory and gold, stack them together with gold sentiment piece on top and adhere them to the bottom part with dimensional tape.
This would make the front card panel to stand as an easel.

Materials used:
Ivory card stock - 330gsm
Gold Mirror card stock
Vellum card stock - 180gsm
Floral Oriental paper
Heartfelt Creations - Sweetheart Border die
Heartfelt Creations - Elegant Swirl Gateway die
Heartfelt Creations - Swirly Accent Spray die
Heartfelt Creations - Ornamental Tags die
Heartfelt Creations - Ornate Ovals die
Heartfelt Creations - Album Tags and Accent die
Heartfelt Creations - Small Classic Petunia stamp and die
Heartfelt Creations - Large Classic Petunia stamp and die
Heartfelt Creations - Leafy Accent stamp and die
Heartfelt Creations - 3D Leafy Accents shaping mold
Heartfelt Creations - Special Birthday Sentiments cling stamp set
Archival inks - Coastal Coral, Fern Green, Leaf Green
White Pigment ink
Ranger - White Superfine embossing powder
Gold Micro Flower pearls
Dimensional Foam Tape
Rajni Chawla's Crystal Clear powder
Hot Glue, Dries clear glue
Heat Embossing Tool
Die-cutting and Embossing Machine


No comments:
Post a Comment